In this exercise you will add the Adobe Sensei auto tag function to auto tag an image followed by the Adobe Experience Manager Update Tags action to update the tags for the image in Adobe Experience Manager.
exercises/exercise-5/composition.js file.Just after the TODO block, begin adding code to call the /sensei/1.0/sensei-autotag action to predict tags for the image. The parameters you’ll need to pass are:
image - the image object to use for swatchesconfidence - level of confidence from 0-1 where 1 is the highest confidenceresults - number of tags to return
/**
 * TODO: Autotag the image invoking '/sensei/1.0/sensei-autotag' action.
 */
composer.retain(
  composer.sequence(
    params => ({
      "image": params.imageObject,
      "confidence": 0.5,
      "results": 10
    }),
  '/sensei/1.0/sensei-autotag',
  (r) => { r.tags.push({"tag": "created with io runtime", "confidence":"1"}); return r; }
  )
),
/* grab autotag results */
({result, params}) => Object.assign({}, result, params),
After the tags have been assigned, the image needs to be updated in Adobe Experience Manager to include them. After the autotag result has been returned, add the following code to call an action to update the tags for the image in Adobe Experience Manager:
     /**
       * TODO: Update the tags in Adobe Experience Manager Assets
       *  by invoking '/adobe/acp-assets-0.5.0/aem-update-tags'
       */
       '/adobe/acp-assets-0.5.0/aem-update-tags',
       /**
       * Return the result as-is
       */
       result => result
     ),
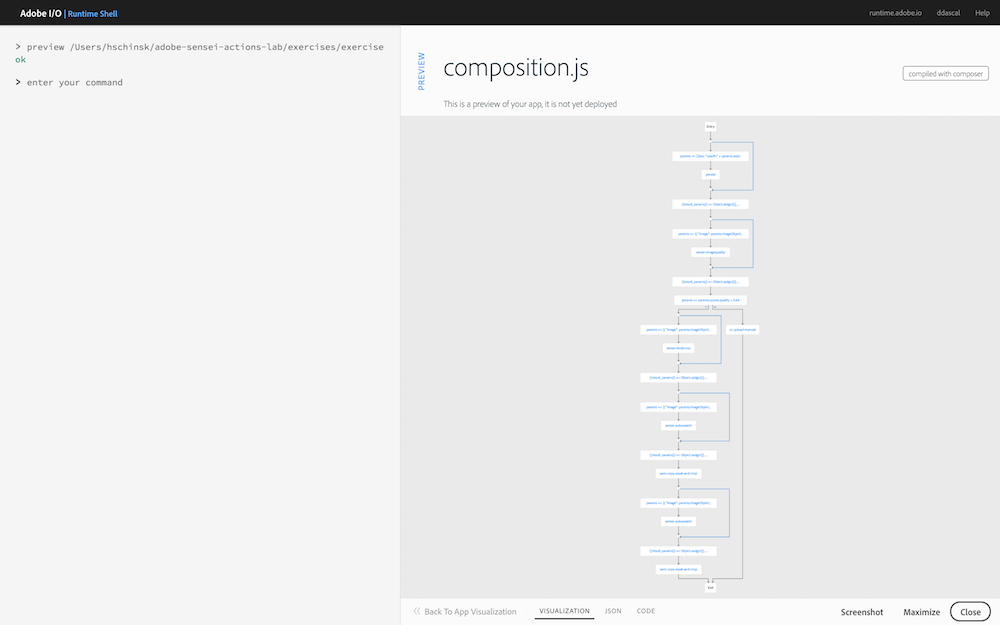
First, preview your composition again to ensure your new changes are shown:
app preview ~/adobe-sensei-actions-lab/exercises/exercise-5/composition.js
Next, update the current asset_created_composition with your new version:
app update asset_created_composition ~/adobe-sensei-actions-lab/exercises/exercise-5/composition.js
Now open the browser to your Creative Cloud and upload an image to trigger an asset_created event.
Switch back to the Adobe I/O Runtime Shell and type:
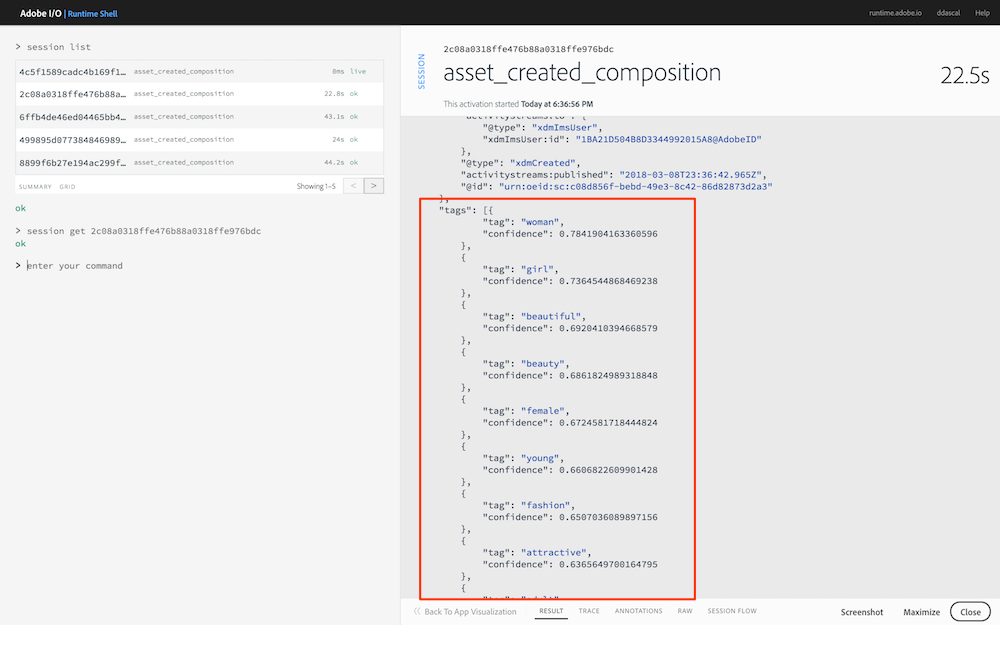
session list
Locate the most recent asset_created_composition running and click on the session id to view the result. If you scroll down in the results JSON you should see the tags that were generated like shown in the session below:
If the app ran successfully then you will see the asset copied into an Adobe Experience Manager instance within the same folder name as you defined in your Creative Cloud instance.
NOTE: Use the Adobe Experience Manager host and credentials provided to login and check Adobe Experience Manager for the file.
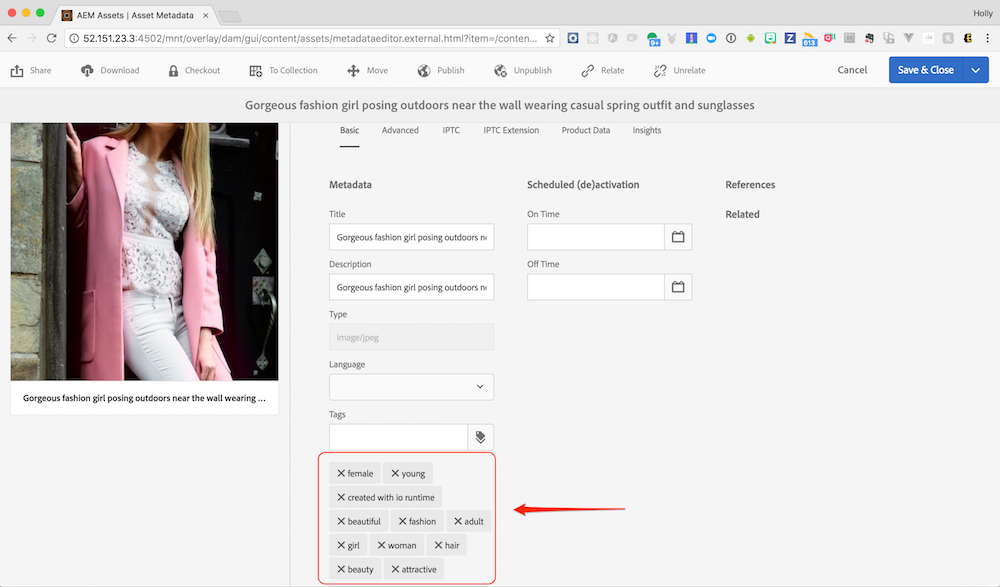
Once you locate the file in Adobe Experience Manager, either hover over it and click the circled i button (or click into it and click on Properties) to view the details and check for the existence of tags. One of them should say created with io runtime as shown below: