In this exercise you will add the Adobe Sensei auto swatch function to automatically extract color swatches from your image, then call an Adobe Experience Manager action that will crop and create swatches from your image, then copy them into Adobe Experience Manager.
exercises/exercise-4/composition.js file.Just after the TODO block, add the following code to invoke the /sensei/1.0/sensei-autoswatch action to crop the body of the image. The parameters you’re passing are:
image - the image object to use for swatchesresults - max number of swatches to returnsize - size of the swatch (or 0)
/**
 * TODO: Invoke '/sensei/1.0/sensei-autoswatch'
 */
composer.retain(
  composer.sequence(
    params => ({
      "image": params.imageObject,
      "results": 2,
      "size": 0
    }),
  '/sensei/1.0/sensei-autoswatch'
  )
),
/* grab autoswatch results */
({result, params}) => Object.assign({}, result, params),
Now that the image quality has been checked and the crop and swatch results returned, the image is ready to be copied into Adobe Experience Manager for final distribution.
After the sensei-autoswatch results are returned, code the following action to perform the crops on the image and copy it into Adobe Experience Manager:
   /**
    *  TODO: Copy asset to Adobe Experience Manager
    *  invoking '/adobe/acp-assets-0.5.0/aem-copy-asset-and-crop' action
    */
   '/adobe/acp-assets-0.5.0/aem-copy-asset-and-crop'
NOTE: This action will also perform the actual cropping and swatch creation from the image prior to copying to Adobe Experience Manager.
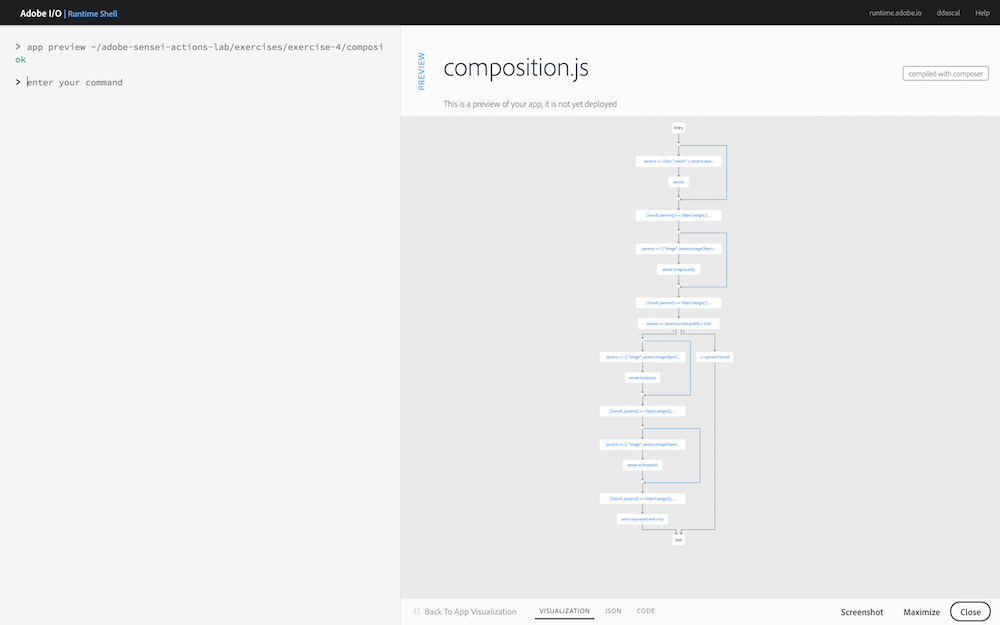
First, preview your composition again to ensure your new changes are shown:
app preview ~/adobe-sensei-actions-lab/exercises/exercise-4/composition.js
Next, update the current asset_created_composition with your new version:
app update asset_created_composition ~/adobe-sensei-actions-lab/exercises/exercise-4/composition.js
Now open the browser to your Creative Cloud and upload an image to trigger an asset_created event.
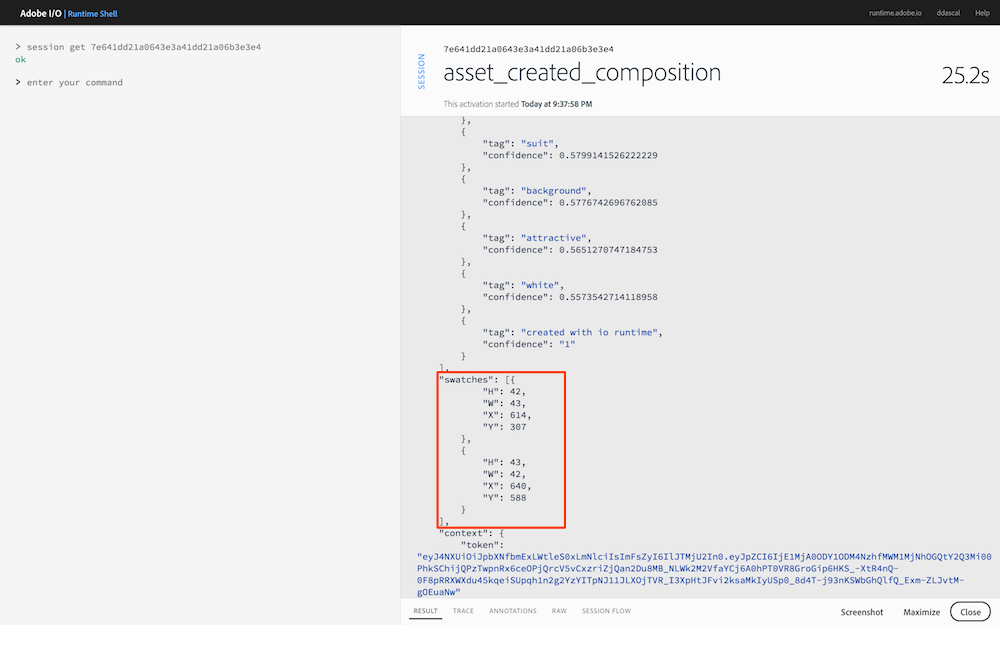
Switch back to the Adobe I/O Runtime Shell and type:
session list
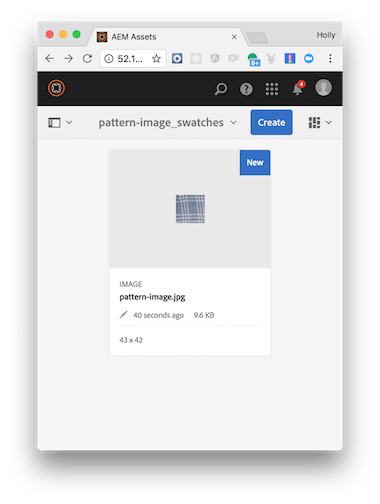
Locate the most recent asset_created_composition running and click on the session id to view the result. If you scroll down in the results JSON you should see the swatch results that were generated like shown in the session below:
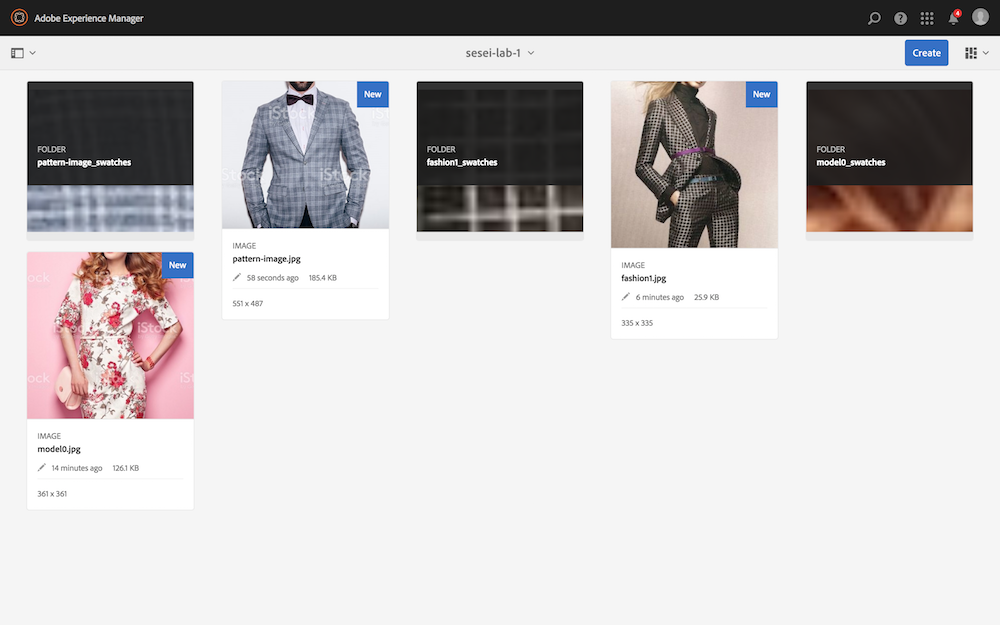
If the app ran successfully then you will see the asset copied into an AEM instance (with the same folder name as you defined in the Creative Cloud).
NOTE: Use the Adobe Experience Manager host and credentials provided to login and check Adobe Experience Manager for the file.
Notice the images now have the face cropped out and a new folder has been created to hold the swatches for the image sized based on the sensei-swatch action results: