In this exercise you will use the Adobe Sensei image quality function to retrieve aesthetic scores for an image, including an overall quality score.
Open the Visual Studio Code application on your worksation located under the Applications folder (or in the dock toolbar).
Go to File -> Open and locate the folder for the exercises and solutions pre-loaded on your workstation in your user directory at ~/adobe-sensei-actions-lab.
Begin by opening the exercises/exercise-1/composition.js file to learn about some specific concepts you’ll need to understand for the remainder of the lab.
composer.sequence(task_1, task_2, ...)
Runs a sequence of tasks where the output parameter from the 1st task in the sequence is the input parameter for the next task.
composer.retain(task)
The
retaincall is a parameter retention function that produces an output with two fields:paramsandresultwhereparamsis the input parameter of the composition andresultis the output oftask.
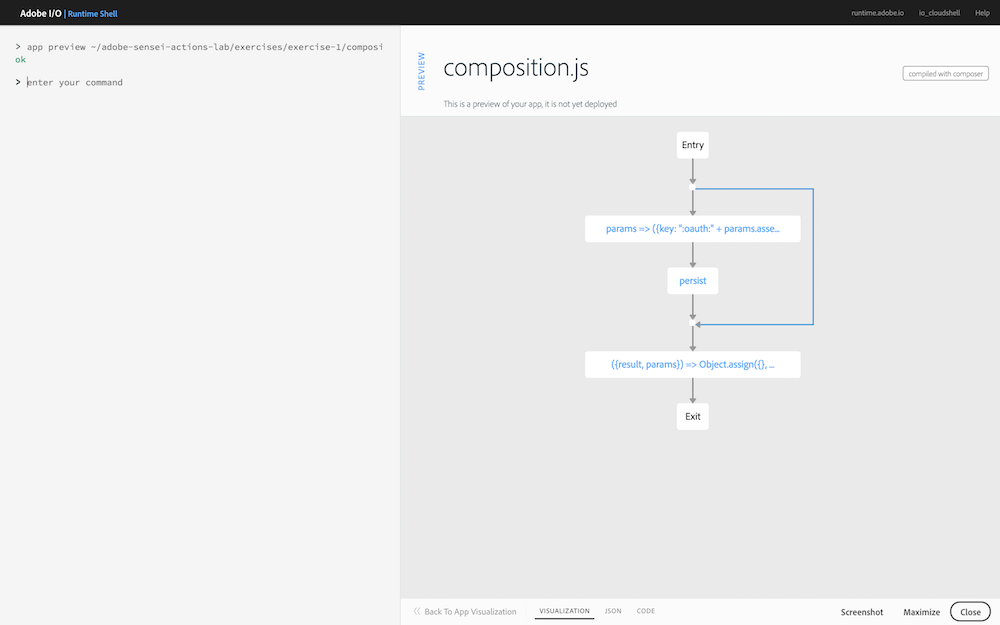
Before editing any code, go back into the Adobe I/O Runtime Shell application and preview the base composition flow with the following command:
app preview ~/adobe-sensei-actions-lab/exercises/exercise-1/composition.js
Now switch back into your editor where the exercises/exercise-1/composition.js file is open, locate the TODO comment block and add the following:
/* TODO: Invoke the /sensei/1.0/sensei-imagequality action
 * passing the imageObject as parameter */
,composer.retain(
  composer.sequence(
    params => ({
      "image": params.imageObject
    }),
  '/sensei/1.0/sensei-imagequality'
  )
),
/* grab image quality results */
({result, params}) => Object.assign({}, result, params)
This code will:
Invoke the /sensei/1.0/sensei-imagequality action with a parameter named image set to the imageObject parameter (previously defined in the base composition code and extracted from the asset created event).
Retain the result received from running the action for further use
Switch back into the Adobe I/O Runtime Shell and preview your updated composition flow with your changes. Make sure it contains the sensei-imagequality action in the visualization as shown below before moving on:
app preview ~/adobe-sensei-actions-lab/exercises/exercise-1/composition.js
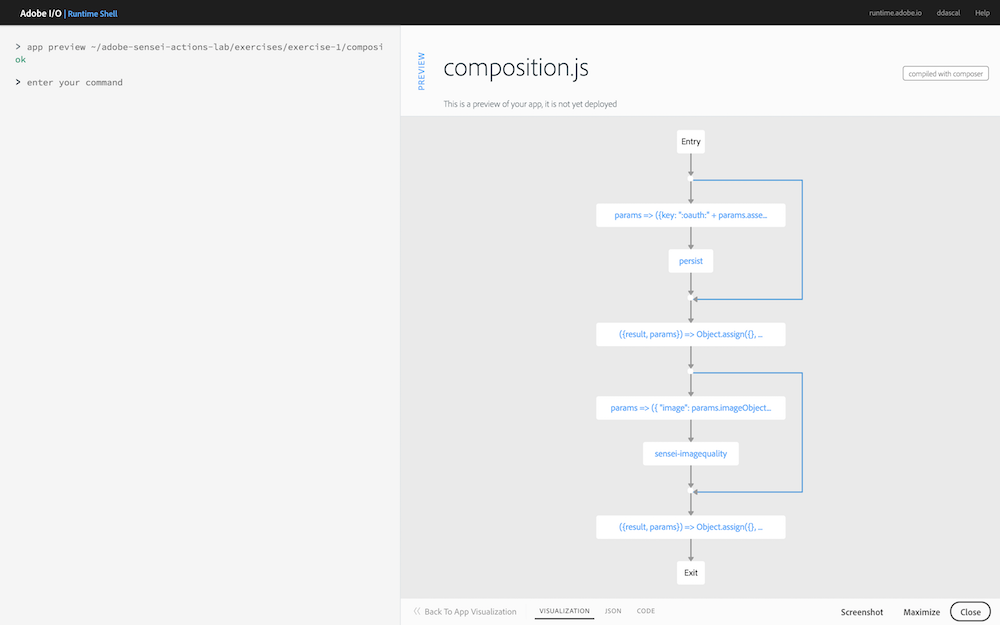
NOTE: Your visualization will automatically update to preview your latest version if you had it running while making your code edits.
Deploy the asset_created_composition with your updated version:
app update asset_created_composition ~/adobe-sensei-actions-lab/exercises/exercise-1/composition.js
Now go back to the browser where your Creative Cloud instance is open and navigate into the new folder you created previously (ie: sensei-lab-1).
Drag and drop (or upload) an image from your workstation into your Creative Cloud folder to trigger an asset_created event.
NOTE: There are images provided for testing within your
~/adobe-sensei-actions-lab/stock-photosfolder. For instance, drag and dropimage1.pngand look at the resulting quality scores.
Switch back to the Adobe I/O Runtime Shell application and run the session list command to list all of the current sessions:
session list
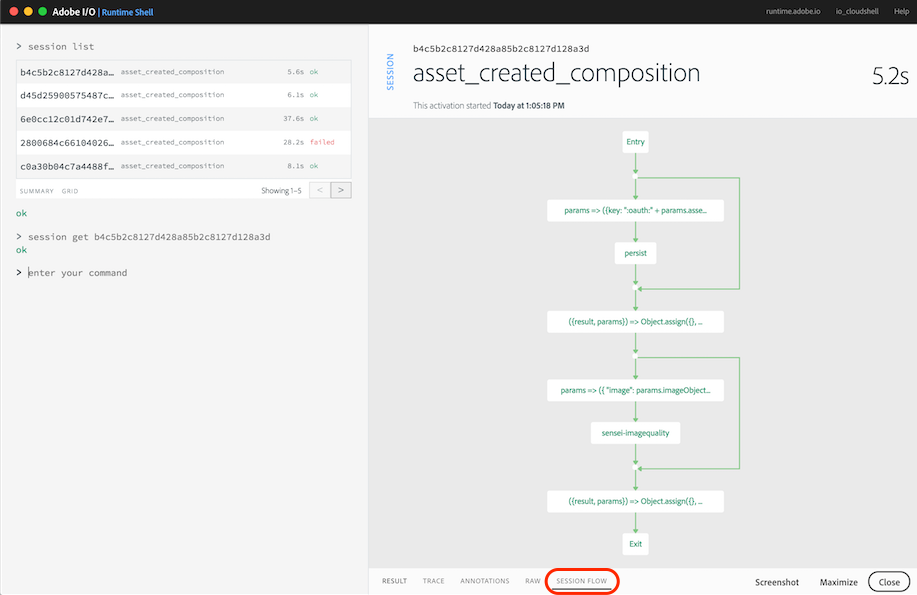
Locate the most recent asset_created_composition running and click on the session id to view the session details.
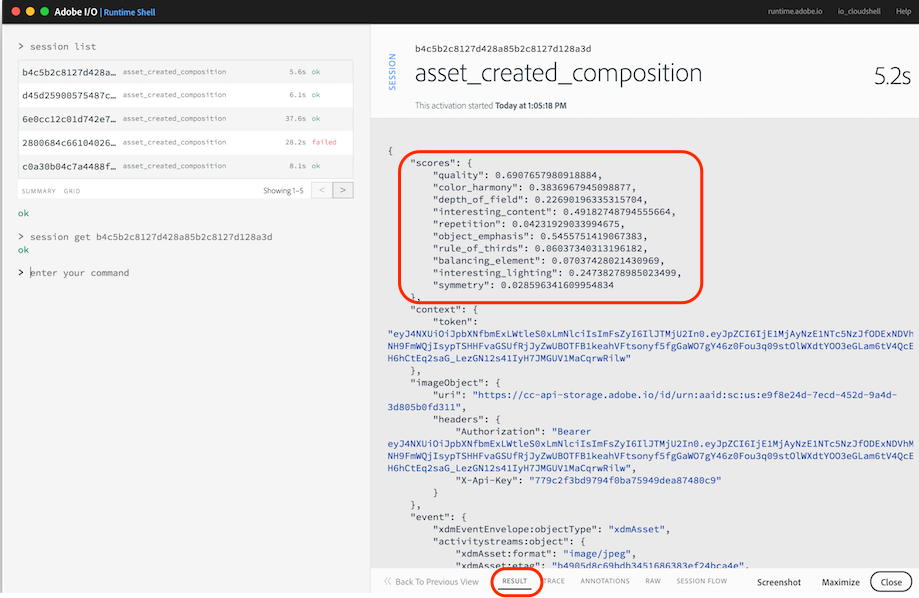
The RESULT tab displays the results in JSON format. If the Sensei image quality action ran successfully, you should see an element in the JSON named scores, with values assigned for attributes further explained below. The quality value is an overall score based on the rest of the individual attributes, and ranges between 0-1 where a higher quality image results in a higher score.
Next, click on the SESSION FLOW tab. If your code ran successfully you should see something similar to below, where all actions completed successfully and are denoted in green: