
Webhooks OAuth 2.0 User Guide
Note
Current release includes enhancement to the Webhooks OAuth 2.0. The /webhookEndpoints API can now be configured at both the account level and the application level. To enable webhookEndpoints/ API configuration at the account level, we made the applicationIDs field optional. This means that if you omit the applicationIDs in a POST /webhookEndpoint request, the webhookEndpoint is created at the account level instead of being linked to a specific application.
Prerequisites
To use Webhook OAuth 2.0, you need to enable the account-level setting WEBHOOK_OAUTH20_ROLLOUT. Please contact Adobe customer support to activate this setting.
Set up Webhooks OAuth 2.0
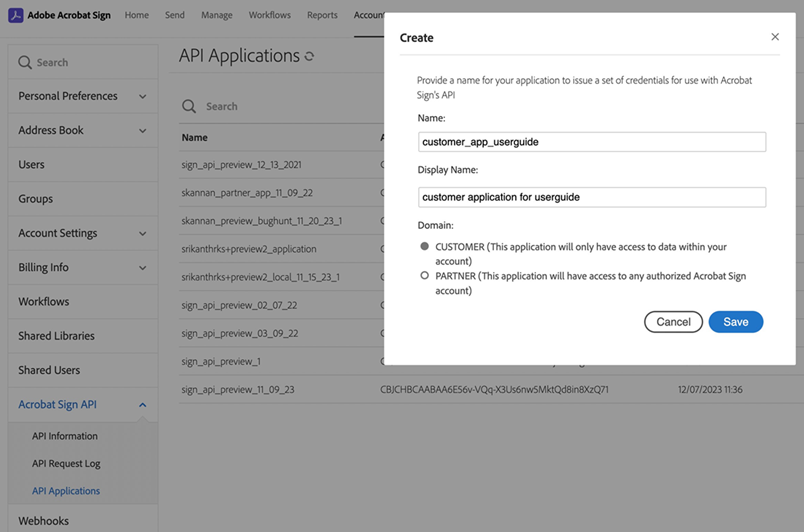
Create a customer application.
Enable the following scopes for the application:
webhook_read
webhook_write
webhook_retention

Follow these steps to generate access_token to authorize requests for a Acrobat Sign API endpoint.
To create a WebhookEndpoint, send a POST request to the /api/rest/v6/accounts/{accountId}/webhookEndpoints with the following JSON body:
webhookEndpoints_POST_curl
curl --location 'https://api.na1.adobesignpreview.com/api/rest/v6/accounts/CBJCHBCAABAAHVF2SeYL6q68j8ttKbJ7stmVG59DtWJT/webhookEndpoints' \
--header 'Content-Type: application/json' \
--header 'Authorization: Bearer 3AAABLKmtbUBUicE9oSp05' \
--data '{
    "name" : "preview_na1_12_19_2023_1",
    "description": "preview_na_12_19_2023_1_description",
    "webhookEndpointUrl": "https://*.domain.subdomain.com/somePath?someQueryParam=*",
    "applicationIds": ["CBJCHBCAABAAhdTfTbSnTtEqZf_cLHgqnXwNqqucWvWa"],
    "oAuth20": {
      "authorizationServerUrl": "https://your.authorization-server.url",
      "clientId": "auth-server-client-id",
      "clientSecret": "auth-server-client-secret",
      "scope": "optional-scope-for-auth-server",
      "customHeaders": [
        {
          "headerName": "header1",
          "headerValue": "value1",
        }
      ]
    }
}'
Note
Adobe Acrobat Sign uses the credentials provided in the OAuth2.0 to call the authorization server URL to get the access_token before a webhook notification. A standard response from the authorization server contains the following fields:
access_token: It is the only mandatory field.refresh_token: It is an optional field.token_type: Bearer token type is supported.expires_in: It is measured in seconds.
{
  "access_token":"HereIsYourSuperSecretAccessToken",
  "refresh_token":"HereIsYourSuperSecretRefreshToken",
  "token_type":"Bearer",
  "expires_in":3600
}
webhookEndpoints_POST
POST /api/rest/v6/accounts/{accountId}/webhookEndpoints HTTP/1.1
Host: api.na1.echosign.com
Authorization: Bearer 3AAABLKmtbUBUicE9oSp05
Content-Type: application/json

{
    "name" : "preview_na1_12_19_2023_1",
    "description": "preview_na_12_19_2023_1_description",
    "webhookEndpointUrl": "https://*.domain.subdomain.com/somePath?someQueryParam=*",
    "applicationIds": ["CBJCHBCAABAAhdTfTbSnTtEqZf_cLHgqnXwNqqucWvWa"],
    "oAuth20": {
      "authorizationServerUrl": "https://your.authorization-server.url",
      "clientId": "auth-server-client-id",
      "clientSecret": "auth-server-client-secret",
      "scope": "optional-scope-for-auth-server",
      "customHeaders": [
        {
          "headerName": "header1",
          "headerValue": "value1",
        }
      ]
    }
}
Note
To enable webhookEndpoints/ API configuration at the account level, omit the applicationIDs in the above POST /webhookEndpoint request.
Replace the value for the following attributes with the correct values:
Attribute |
Description |
|---|---|
name |
Name of the webhookEndpoint resource that you want to create. It’s length cannot be more than 255 characters. |
description |
Optionally, add a description for the webhookEndpoint. |
webhookEndpointUrl |
This is a webhookEndpoint URL pattern that you would like to be mapped to one or more webhook(s) that belong to the same account. See webhookEndpointUrl details. |
applicationIds |
(Optional) You can provide one or more Application IDs (alphanumeric) that needs to be associated. If you don’t inlcude applicationIDs attribute, the webhookEndpoints/ is configured at account level. |
authorizationServerUrl |
URL of the authorization server for getting the access token. |
clientId |
clientId for the authorization server. |
clientSecret |
client secret for the authorization server. |
scope |
scope, if any, needed for the authorization server. |
customHeaders |
A map of key-value pairs that you want in webhook notification request for increased personalization. |
To associate the webhookEndpointUrl details for a new webhook, send a POST request to /api/rest/v6/webhooks with the following JSON body:
Note
The webhookUrlInfo is not required when creating a webhook linked to a webhookEndpoint.
POST /api/rest/v6/webhooks HTTP/1.1
Host: api.na1.echosign.com
Authorization: 3AAABLKmtbUBUicE9oSp05
Content-Type: application/json

{
    "name": "preview_na1_webhook_12_19_2023_1",
    "scope": "USER",
    "state": "ACTIVE",
    "webhookSubscriptionEvents": [
        "AGREEMENT_ACTION_COMPLETED"
    ],
  "webhookEndpointInfo" : {
    "webhookEndpointId": "e6a238bc-1c67-463c-992c-9edc9ba637a7",
    "domainPrefix": "callback-prod",
    "urlSuffix": "agreement_12_19_2023_1"
  }
}
Replace the value for the following attributes with the correct values:
Attribute |
Description |
|---|---|
name |
Name of the webhookEndpoint resource that you want to create. It’s length cannot be more than 255 characters. |
scope |
Scope of webhook. This attribute can’t be modified in PUT request. The possible values are ACCOUNT, GROUP, USER or RESOURCE. |
state |
The state in which the webhook should be created. The possible values are ACTIVE, INACTIVE and DELETED. |
webhookSubscriptionEvents |
Any valid Event(s) that a webhook would need to be notified. |
webhookEndpointId |
The webhookEndpointId that to be associated with this webhook. |
domainPrefix |
Optional URL subdomain value. This value will be used to replace the first wildcard (*). |
urlSuffix |
Optional Url Suffix to append to the WebhookEndpointId. This value will be used to replace the wildcard (*) at the end. |
You will get the following response containing the id of the webhook created:
{
    "id": "fe4880d0-4e16-4964-b5ab-07b06d30a430"
}
Once the webhook is configured with OAuth 2.0 (webhookEndpointId), all future webhook notifications (associated with respective scope) will include the access_token provided by the authorization server, as shown below.
Note
Note the addition of a new value “authorization” under the requestHeaders. This will be included with the remaining headers from before.
webhookEndpointUrl details
For webhookEndpointUrl, you can provide a leading and a trailing wildcard that would be replaced with respective values (domainPrefix and urlSuffix) when the webhook(s) are created by providing the webhookEndpointId, in addition to that.
Example webhookEndpointUrl: https: //yourDomain.com/webhook?agreementID=
You can link this webhookEndpointUrl to any new webhooks you create by using the id from the response in webhookEndpointInfo. Include domainPrefix and urlSuffix if you’re using wildcards. After associating the webhookEndpoint resource using the webhookEndpointId, with domainPrefix as “dev-01” and urlSuffix as “agreement123,” the resulting webhookUrl for /api/rest/v6/webhooks will be as follows: https: //dev-01.yourDomain.com/webhook?agreementId=agreement123
You will get the following response containing the id:
{
    "id": "e6a238bc-1c67-463c-992c-9edc9ba637a7"
}
The returned id is used to uniquely identify the webhookEndpoint.