Chapter 4. Call Sensei API from Runtime
Learning Objectives
- Write an action that makes an API call to Adobe Content Sensei Services
Lab Tasks
- Add Sensei as a Service
- Create Runtime action to make an API call to Sensei Service
- Create an action that gets an Access Token for Sensei Service
- Make a call to Sensei Service
1. Add Adobe Content Sensei Services as a Service
GOAL: We will add Adobe Content Sensei Services as a service in your integration
- Navigate to Adobe I/O Console at https://console.adobe.io in your browser
- Find the Integration that you created during Chapter 1 and open it
- Select the
Servicestab in your Integration - Under
Available Services, selectContent AI (Beta)from theAdobe Senseicategory. - Click
Add Serviceto complete - You should now see 2 services under
Configured Services, Adobe Content AI (Beta) and I/O Management API
2. Create Runtime action to make an API call to Sensei
GOAL: We will start with an action that gets an access token for Sensei, then add an API call to the action so that your action can get tags for an image using Sensei Content Service.
Set up an action that gets an Access Token for Sensei Content AI
Any API that accesses a service or content on behalf of an end user authenticates using the OAuth and JSON Web Token standards. For service-to-service integrations, you will also need a JSON Web Token (JWT) that encapsulates your client credentials and authenticates the identity of your integration. You exchange the JWT for the OAuth token that authorizes access.
For more details, please refer to Service Account Integration documentation
The JWT Workflow contains 6 steps
- 1- Create a Public Key Certificate
- 2- Subscribe to a Service or Event Provider
- 3- Configure a Service Account Integration
- 4- Secure your Client Credentials
- 5- Create your JSON Web Token (JWT)
- 6- Exchange your JWT for an Access Token
Let’s set up an action that helps you create and store an Access Token in Runtime
- In the resources you have downloaded, navigate to
adobeio-cna-lib-auth-ims-masterfolder$ cd ~/Desktop/adobeio-cna-lib-auth-ims-master/For Git users, you can also get the latest copy off our GitHub repo.
- We’ll create a
.envfile to configure this library to your integration. Run the following commands$ touch .env $ open .env - Copy the following block in as place holder:
OW_NAMESPACE="<change-me>" # Optional parameters (should use 'npm run configure' if used) IMS_AUTH_TYPE=<code/jwt> - You can find the first two values using your Adobe I/O CLI
$ aio runtime property getUpdate
OW_NAMESPACEin the.envfile to match to yourwhisk namespace. - Save your
.envfile. - Now, we’ll also populate the
jwt.jsonfile.$ open jwt.jsonMost values can be found in the
Overviewtab in Console. The metascope can be seen in your JWT tab, it should look something like this"meta_scopes": ["https://ims-na1.adobelogin.com/s/ent_adobeio_sdk", "https://ims-na1.adobelogin.com/s/ent_sensei_image_sdk"]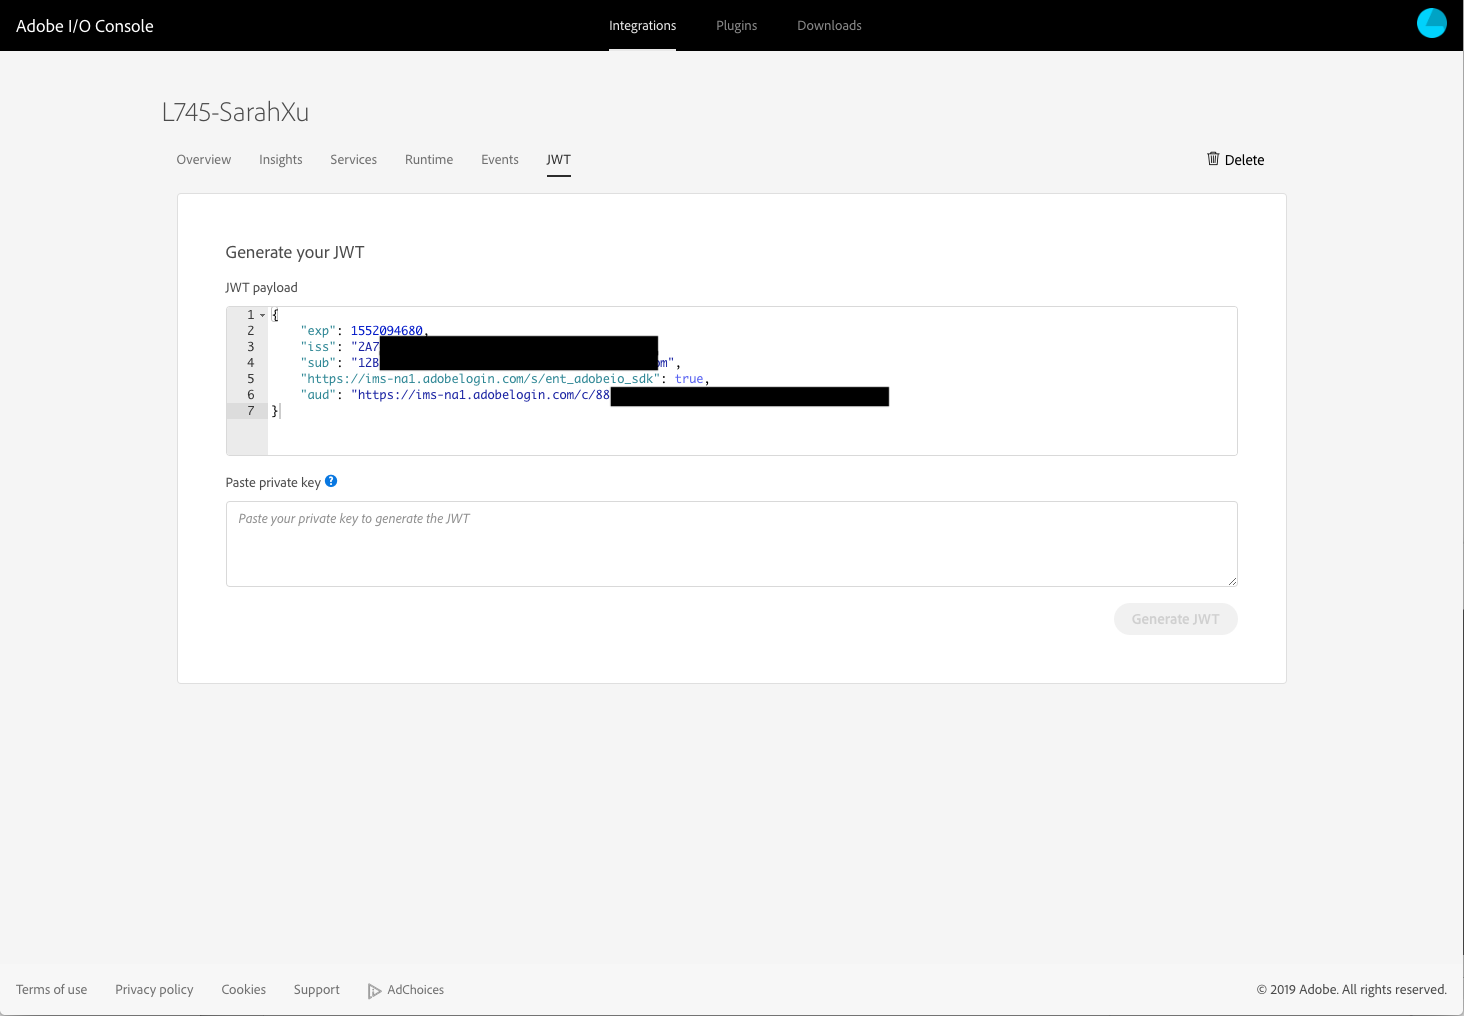
- Next, run the following command,
awk -v ORS='\\n' '1' ~/Desktop/private.key | pbcopyThe private key has now been copied to your clipboard. Paste it into
jwt_secretfield. Starting from-----BEGIN PRIVATE KEY-----to-----END PRIVATE KEY-----. - Save your
jwt.jsonfile. - Your AUTH library is now set up. Let’s deploy it into your namespace by running the following command.
 $ npm install
 $ npm run deploy-jwt
Your should get something that looks like
endpoints (web actions): https://https://adobeioruntime.net/api/v1/web/<YOUR_NAMESPACE>/jwtauthp/jwtauthenticate
Run the action to get an Access Token
- You now have 2 new packages for Auth in your namespace. You can look them up by
$ aio runtime package listYou should see
/NAMESPACE/jwtauthp-shared private /NAMESPACE/jwtauthp private - Now, let’s invoke the Auth aciton to get a token
$ aio runtime action invoke jwtauthp/jwtauthenticate --blockingYou can see that this is actually a sequence, and has invoked multiple actions.
- You can now look up your access token at
$ aio runtime action invoke jwtauthp-shared/jwtauth --resultYou should see your access token returned.
``` { “accessToken”: “xxxxxxxxxxxxxxxxxxx”, “accessTokenExpiry”: xxxxxxxxxxxxxxxxxxx } }
3. Invoke Sensei API using this Access Token
- There’s a sample action on your Desktop
sensei.js. Let’s create a new action with it.$ aio runtime action update sensei sensei.js - Now let’s try to invoke this action manually by passing in some parameters. Build the following command in your text editor
aio runtime action invoke sensei --param accessToken <insert accessToken from above> --param ent_api_key <insert API key from Console Integration> --param image_url https://www.jcpportraits.com/sites/jcpportraits.com/files/portrait/1712/7_182-456_FamilyGallery6.jpg --param results 10 --param confidence 0.5 --result - When ready, paste this command into your Terminal to invoke the action, you should get something that looks like
 {
 "tags": [
 {
   "confidence": 0.9170970402413429,
   "tag": "family"
 },
 {
   "confidence": 0.8392684959100764,
   "tag": "child"
 },
 {
   "confidence": 0.8171461274057861,
   "tag": "happy"
 }....
This is a list of tags for the image and the confidence score for each tag
- Open a browser window and go to
https://www.jcpportraits.com/sites/jcpportraits.com/files/portrait/1712/7_182-456_FamilyGallery6.jpgDoes the tags look accurate?
4. Create Runtime action to make an API call to Sensei Content AI
Challenge: Using the sample call above, can you figure out how to use the access token you just create to make an API call to Sensei Content API? (Hint: default parameter and sequences are your best friends.)
If you got it right, the result should look something similar to your last call.
Navigate
| Next: |
|---|
| Lesson 5 - Use Project Starter to build an app with UI |
Return Home: Workbook Index