Chapter 5. [Bonus] Use Project Starter to build an app with UI
Learning Objectives
- Use the Adobe I/O Cloud Native Application Project Starter to kick off an app with UI
Lab Tasks
- Configure Adobe I/O CNA Project Starter
- Make changes to the actions for testing
1. Configure Adobe I/O CNA Project Starter
GOAL: We will configure Adobe I/O CNA Project Starter
The Project Starter is a sample Cloud Native Application built on React. It provides some simple actions and UI components that helps you kick off development on Runtime. Let’s first set up the project.
- Download the chapter 5 package or for the GitHub users, you can use the Starter Project Repo.
- Unzip it and place the content of the folder on the Desktop
- Navigate to
adobeio-cna-starter-project-masterfolder$ cd ~/Desktop/adobeio-cna-starter-project-master - Similar to the last chapter, we are also using use a
.envfile to configure this library to your integration. Run the following commands$ touch .env $ open .env - Use the following block as placeholder and update the values:
 WHISK_APIVERSION=v1
 WHISK_APIHOST=https://adobeioruntime.net
 WHISK_AUTH=<AUTH>
 WHISK_NAMESPACE=<namespace>
 TVM_URL=https://adobeioruntime.net/api/v1/web/adobeio/tvm/get-s3-upload-token
Note: the
TVM_URLhere points to CNA token vending machine. It is a shared action that allows you to download temporary and restricted credentials to upload your static files to S3. Credentials will be cached in .aws.tmp.creds.json. Users with a valid namespace for Adobe I/O Runtime can simply use https://adobeioruntime.net/api/v1/web/adobeio/tvm/get-s3-upload-token. - You’ll need to add the
WHISK_AUTHandWHISK_NAMESPACEvalue, which you can find using your Adobe I/O CLI$ aio runtime property getWHISK_NAMESPACEshould map to yourwhisk namespace, whileWHISK_AUTHshould map to yourwhisk auth. - Save and exit your
.envfile.
2. Deploy your Project Starter locally
GOAL: We will deploy and play with the Adobe I/O CNA Project Starter locally in this section.
One of the features of the CNA Project Starter is local development and testing. In the following section, we’ll deploy your Project Starter locally, and play with the actions to familiarize with the project structure.
- Let’s first install all dependencies
$ npm install - Let’s start start your local Dev server
$ npm run devWhen you see the following message, your app has been deployed locally
⠋ Building...Serving on port 9080 ✨ Built in x s - You can now go to http://localhost:9080/ to see your locally deployed CNA.
- By default, you should see the following page.
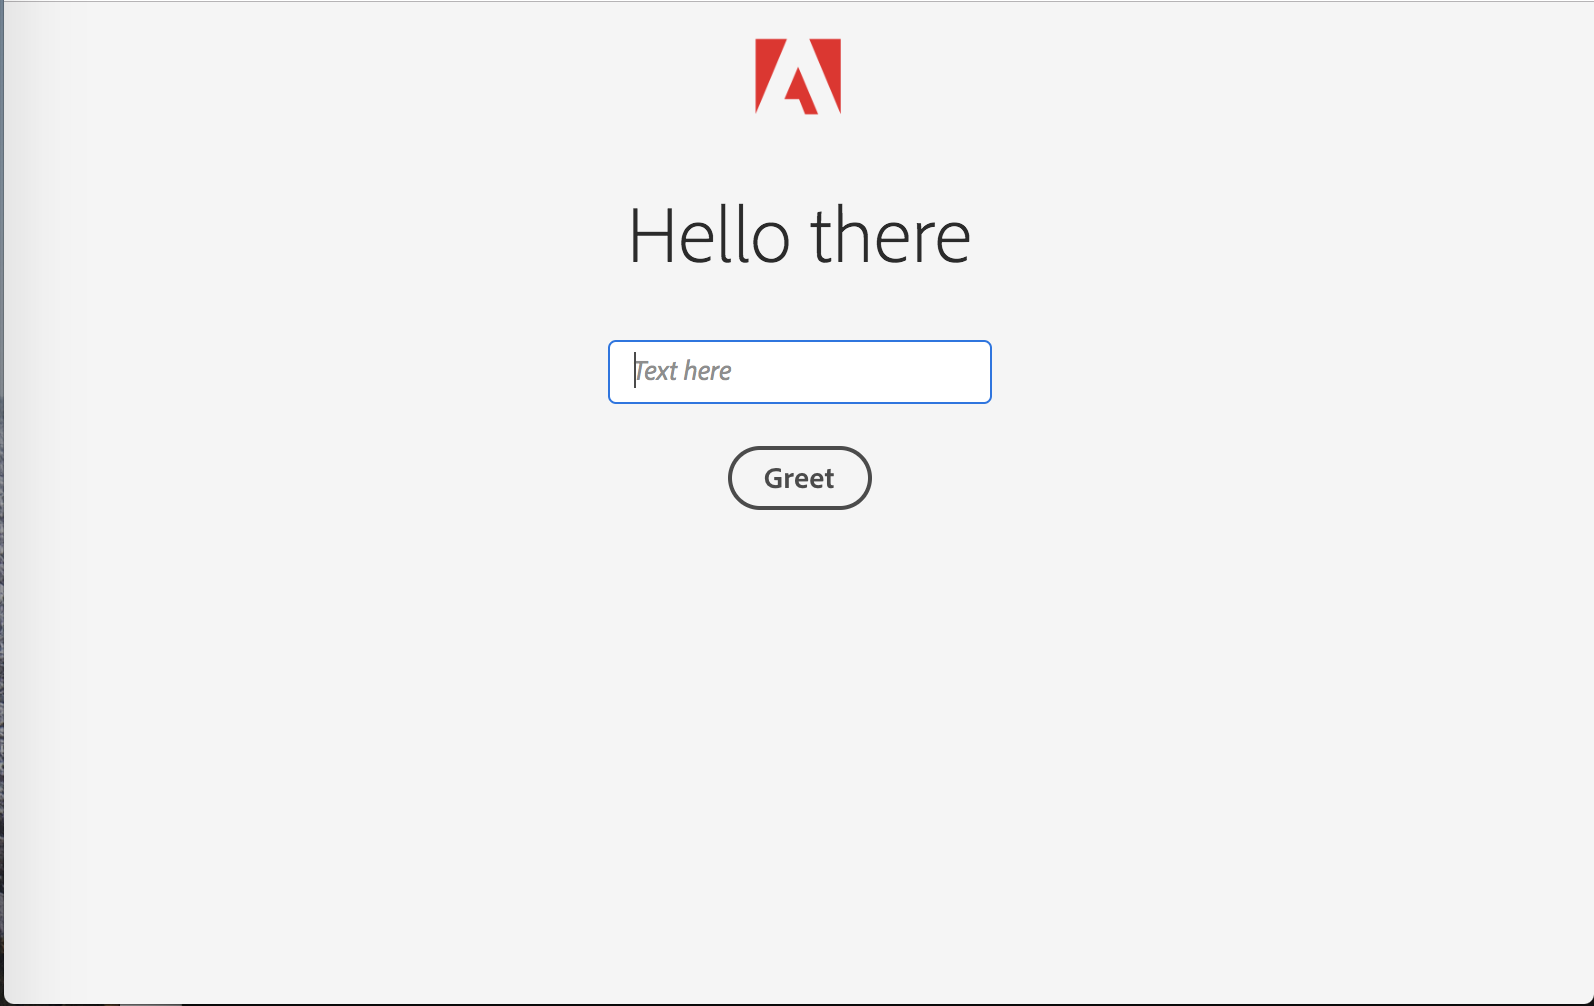
-
If you type your name into the textbox, and click
Greet, the title should change accordingly.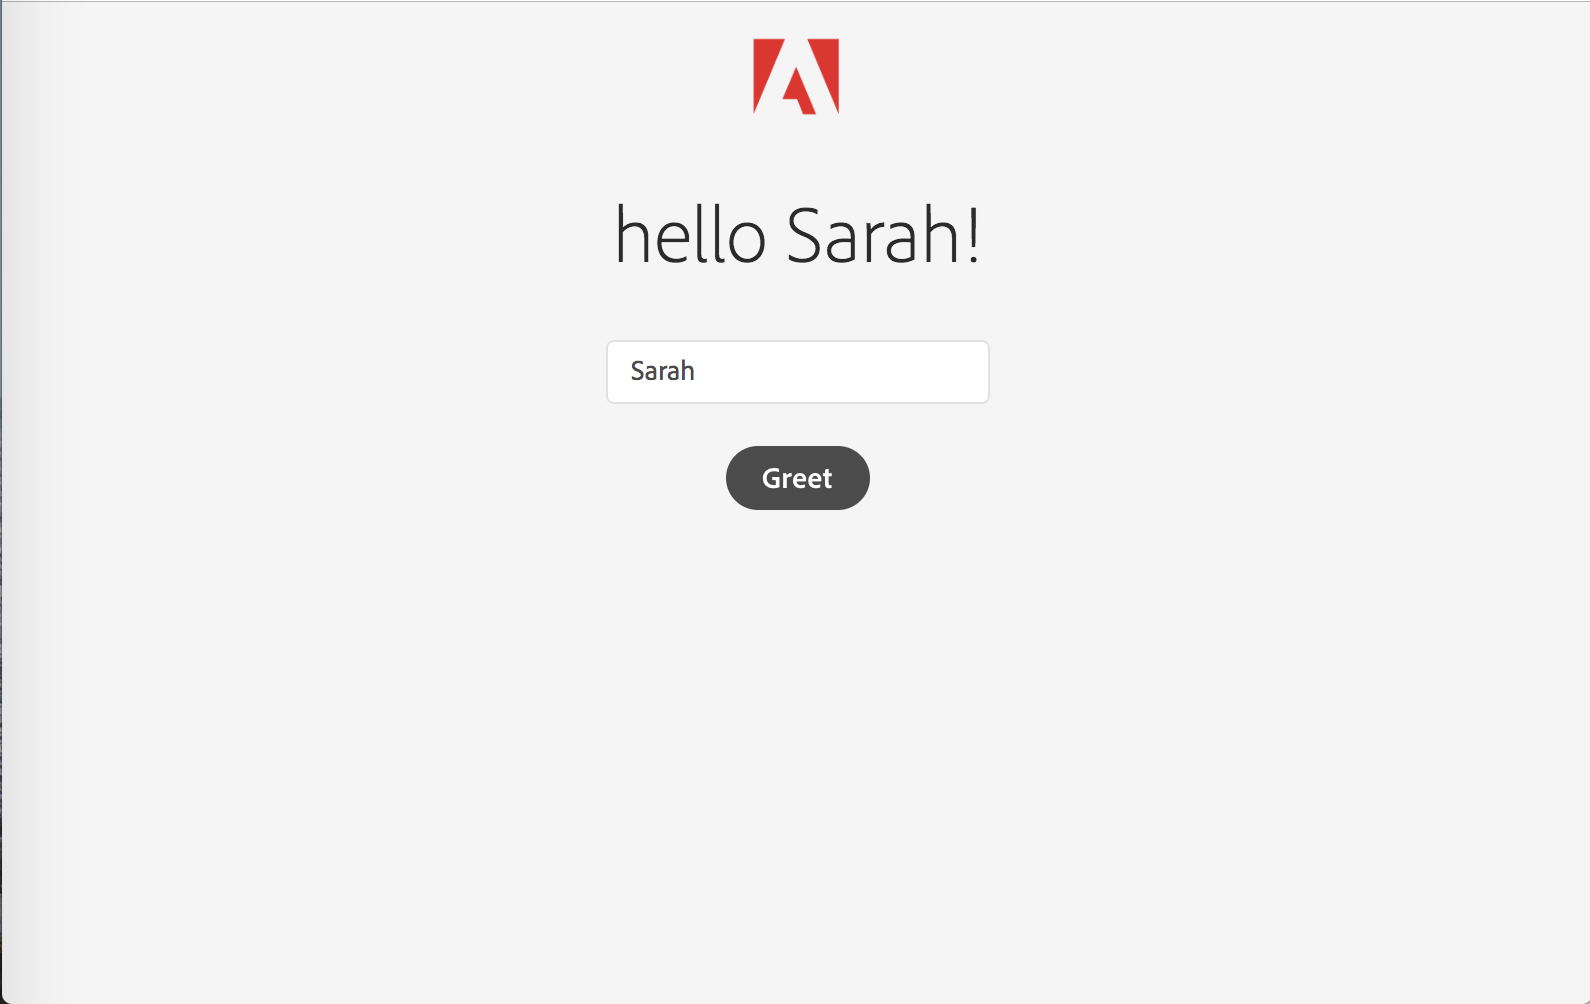
- For a later step, let’s go back to your Terminal and type in
npm run coverageto generate a code coverage report. We’ll make some code changes and come back to compare the report.
When the Project Starter is deployed locally, the local dev server uses an expressJS proxy to invoke action code. The UI is simple React application, with the default defined in ~/Desktop/adobeio-cna-starter-project-master/web-src/src/pages/Hello.js.
- Let’s open this file in your text editor
- In this file, you can see that the default greeting is set to
greeting: 'Hello there'. Let’s change it toHello Adobe APACand save this file. - Go back to your browser at
http://localhost:9080/, you should see the UI updated accordingly.
The Greet button is linked to the backend options, which takes in the input from the text field and generates “Hello x” type phrase. You can find it at ~/Desktop/adobeio-cna-starter-project-master/actions/hello/index.js. Let’s change it a bit as well.
- Let’s open this file in your text editor
- Find the line that sets the message
hello ${name}!. Let’s change it toWelcome to Adobe, ${name}!and save this file. -
Go back to your browser at
http://localhost:9080/, type in your name in the text field, and you should see your change reflected immediately.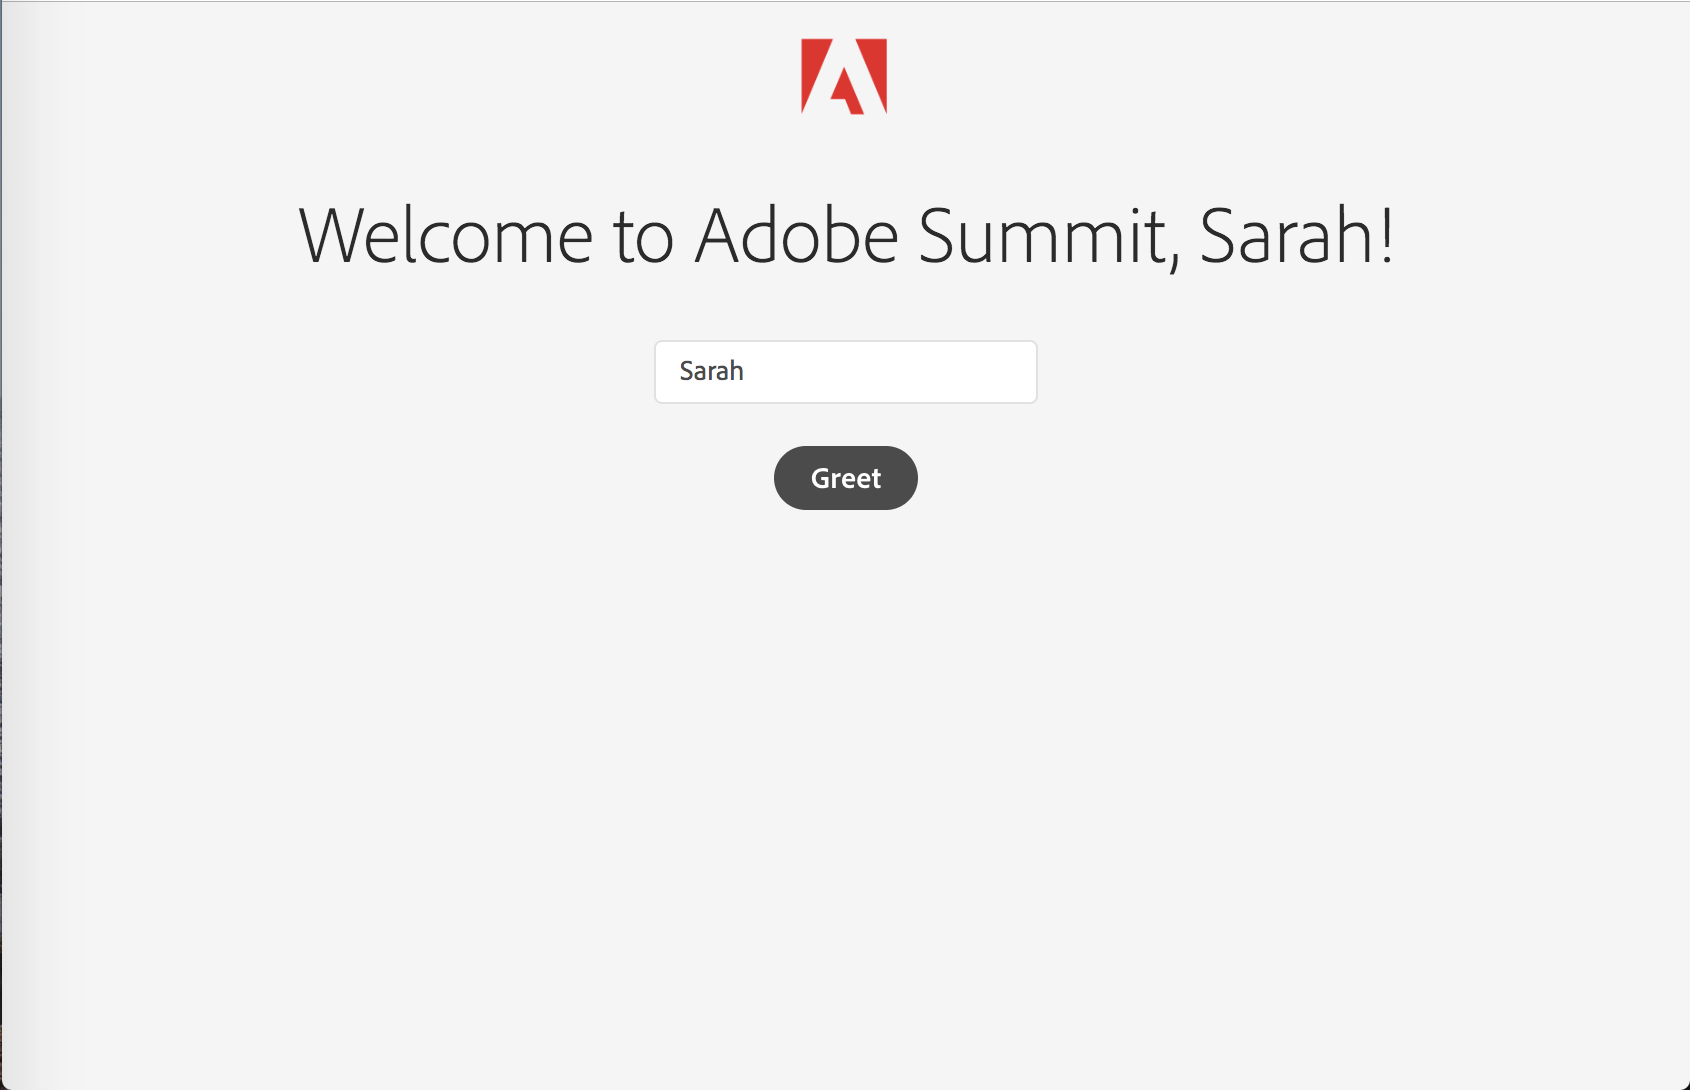
- You can also invoke your back-end actions defined locally via the url. Try http://localhost:9080/actions/hello?name=yourname, and you should be able see a json representation of the response.
- Try
npm run coverageagain and see how your report changed.
3. Deploy your CNA Project Starter into the cloud
GOAL: We will deploy the Adobe I/O CNA Project Starter into the cloud in this section.
Let’s assume you are now happy with your application and ready to deploy it into the cloud. Using the following build and deploy commands, the actions will be deployed into your Runtime namespace, while the static assets deployed into an Adobe-hosted S3 bucket.
- Let’s start start your local Dev server
 $ npm run build
 $ npm run deploy
Upon success, you should see the folloiwng message
Deployment succeeded 🎉 Access your app @ https://s3.amazonaws.com/adobe-cna/xxxxxx/runtime-cna-starter-1.0.0/index.html ! - Open the URL listed, and voila – you can now see your first Cloud Native Applicated running in the cloud!
4. What’s next
Adobe I/O CNA just started building – and we are developing as open source projects! Sign up for our newsletter to stay tuned or join us on GitHub as contributors! :) http://bit.ly/aio-cna
Return Home: Workbook Index